How to Choose the Right Motorcycle Fairings: A Complete Buyer’s Guide
By John Mike
Published on 2026-01-15 17:07:00
Learn how to choose the right motorcycle fairings with our complete buyer’s guide. Discover the best materials, molding processes, and fitment tips to upgrade your bike with confidence.
For many riders, the visual identity of their motorcycle is just as important as the engine that powers it. Fairings are the skin of your bike; they define its silhouette, protect its vital components, and manage the wind that rushes past you at highway speeds. But when it comes time to replace or upgrade them—whether due to a slide, sun damage, or simply the desire for a fresh look—the world of aftermarket fairings can feel like a minefield of conflicting information.
Choosing the right fairings is not just about picking a color you like. It involves understanding materials, manufacturing processes, and the nuances of fitment. A poor choice can lead to hours of frustration in the garage, forcing mismatched panels onto a frame they weren’t designed for. Conversely, the right choice can restore your bike to showroom glory or transform it into a unique custom machine.
This guide is designed to cut through the confusion. We will explore the different types of fairings, explain why materials like injection-molded ABS plastic matter, and give you the knowledge you need to buy with confidence. At Amotopart, we believe an informed rider is a happier rider, and we’re here to help you make the best decision for your machine.
Understanding Motorcycle Fairings: Form and Function
Before diving into materials and manufacturing, it's essential to understand the different categories of fairings and what they offer. Fairings serve two primary purposes: aerodynamics and protection. By smoothing out the airflow around the bike, they reduce drag and wind buffeting, making your ride smoother and more efficient.
1. Full Fairings
These are most commonly found on sportbikes and touring motorcycles. A full fairing kit covers the upper and lower portions of the motorcycle, enclosing the engine and chassis.
-
Pros: They offer the best aerodynamic efficiency and wind protection for the rider. They also provide the largest canvas for custom graphics and paint schemes.
-
Cons: They can make engine maintenance slightly more time-consuming, as panels often need to be removed to access components.
-
Best For: Riders who prioritize high-speed stability, wind protection, and a sleek, race-ready aesthetic.
2. Half Fairings
As the name suggests, these cover only the upper portion of the bike, typically extending from the headlight back to the sides of the radiator, leaving the engine exposed. They are often found on sport-touring and standard bikes.
-
Pros: They offer a good balance of wind protection and engine accessibility. Many riders also appreciate the mechanical aesthetic of an exposed engine.
-
Cons: They provide less lower-body wind protection than full fairings.
-
Best For: Riders who want wind deflection without the bulk of a full kit.
3. Quarter Fairings (or Bikini Fairings)
These are small windshields or cowls that surround the headlight. They are minimal and lightweight.
-
Pros: They add a stylish touch and keep the bike lightweight.
-
Cons: They offer minimal wind protection, mostly deflecting air away from the instrument cluster rather than the rider.
-
Best For: Café racers, cruisers, and riders who prefer a "naked" look but want a small aerodynamic aid.
Material Matters: Why ABS Plastic is the Gold Standard
When shopping for aftermarket fairings, you will encounter two main materials: fiberglass and ABS plastic. Understanding the difference is critical for durability and fitment.
The Drawbacks of Fiberglass
Fiberglass is often used in race fairings because it is lightweight and easy to repair. However, for street use, it has significant downsides. It is rigid and brittle, meaning it cracks easily under stress or vibration. It also tends to have a rougher finish that requires significant prep work before painting.
The Superiority of ABS Plastic
For street motorcycles, ABS (Acrylonitrile Butadiene Styrene) plastic is the industry standard, and for good reason. It is the same material used by original equipment manufacturers (OEMs).
-
Flexibility: ABS has inherent flexibility, allowing it to absorb road vibrations and minor impacts without cracking. This makes it far more durable for daily riding.
-
Heat Resistance: It can withstand the heat generated by the engine without warping or melting.
-
Finish: ABS provides a smooth surface that is ideal for painting, ensuring a high-quality, professional finish.
At Amotopart, we focus on high-grade ABS plastic to ensure that our aftermarket kits offer the durability and longevity you expect from factory parts.
The Manufacturing Process: Compression vs. Injection Molding
Even if two kits are made from ABS plastic, the way they are shaped makes a massive difference in how they fit your bike.
Compression Molding
In this older method, plastic is heated and pressed into a mold. While cheaper, it is less precise. Compression-molded fairings often have inconsistent wall thickness and mounting tabs that may not align perfectly. This leads to the dreaded "forced fitment," where you have to stretch or bend panels to get bolt holes to line up.
Injection Molding: The Precision Choice
Injection molding is the modern standard for high-quality fairings. In this process, molten ABS plastic is injected into a high-precision mold under high pressure.
-
Consistent Thickness: The pressure ensures the plastic fills every cavity evenly, creating uniform thickness throughout the part.
-
Perfect Tabs and Holes: Mounting tabs and bolt holes are formed as part of the mold, not added later. This results in OEM-level precision.
-
Plug-and-Play: Because the tolerances are so tight, injection-molded fairings usually fit straight out of the box without the need for drilling or modification.
If you want a hassle-free installation, always look for injection-molded fairings. It is the single most important factor in ensuring a clean, gap-free fit.
Evaluating Paint and Finish Quality
Once you’ve confirmed the material and molding process, the next consideration is the finish. A raw plastic fairing is useless if the paint peels after a few months in the sun.
Look for fairings that feature a multi-layer paint process. A high-quality kit should include:
-
Primer Layer: To ensure strong adhesion of the base coat.
-
Base Coat: The primary color layers are applied evenly to prevent runs or thin spots.
-
Clear Coat: This is crucial. A thick, UV-resistant clear coat protects the paint from fading in the sun and shields it from road debris and scratches.
At Amotopart, we use a comprehensive painting process that includes multiple layers of clear coat to lock in the color and shine, ensuring your bike looks as good three years from now as it does the day you install the kit.
Fitment Verification: Don't Assume, Double-Check
The most common mistake buyers make is assuming "close enough" will work. Motorcycle manufacturers often make subtle changes to fairing mounts between model years. A 2006 model might look identical to a 2007 model, but the bolt pattern could be off by a few millimeters.
Steps to verify fitment:
-
Check the Year Range: Ensure the kit explicitly lists your specific year.
-
Verify the Model Code: For example, a GSX-R600 and a GSX-R750 of the same year often share fairings, but a GSX-R1000 might be different.
-
Look at Headlight and Intake Shapes: These are often the first things to change during a model refresh. Compare the product photos to your current bike’s layout.
Buying Considerations: Price vs. Value
It is tempting to go for the cheapest kit you can find on an auction site. However, in the world of fairings, price is often a reflection of quality control. Extremely cheap kits often cut corners on the molding process (using compression instead of injection) or the paint quality (skipping the UV protection).
Investing in a reputable aftermarket supplier like Amotopart ensures you are getting injection-molded ABS plastic, professional paintwork, and customer support that stands behind the product. The few dollars you save on a "bargain" kit are quickly lost in the hours spent trying to drill your own holes or repainting peeling panels.
Frequently Asked Questions (FAQ)
Will aftermarket fairings fit exactly like OEM fairings?
High-quality injection-molded aftermarket fairings typically offer 95-99% of OEM fitment. While minor adjustments are occasionally needed, they are designed to be direct replacements. Compression-molded kits, however, often require significant modification.
Are the mounting holes pre-drilled?
Yes, reputable injection-molded kits come with all mounting holes pre-drilled. If you buy a kit and have to drill the holes yourself, it is likely a lower-quality compression-molded product.
Do fairing kits come with bolts and hardware?
Most fairing kits include the plastic panels but do not include the mounting bolts, grommets, or wind nuts. You typically transfer these from your old fairings. If your hardware is damaged, it is recommended to buy a separate universal fairing bolt kit.
Can I mix and match aftermarket panels with my OEM panels?
Generally, yes. If the aftermarket panel is injection-molded, it should mate correctly with an OEM panel. However, paint matching can be tricky. Even if the color code is the same, paint fades over time, so a brand-new panel might look slightly brighter than your older OEM panels.
How do I protect my new fairings from heat melting?
This is a critical step. OEM fairings often come with heat shielding on the lower panels near the exhaust headers. When installing aftermarket fairings, you must apply heat shielding mats to the inside of the lower panels to prevent the ABS plastic from warping or melting due to engine heat.
What happens if the fairings arrive damaged?
Shipping large, painted plastic parts is risky. Reputable sellers package each piece individually in foam and robust boxes. Always check the seller’s shipping and return policy. Amotopart inspects every kit for durability and fitment before shipping to minimize these issues.
Can I get a custom design that isn't listed?
Many aftermarket suppliers offer customization services. Because the parts are painted to order, it is often possible to request specific color changes, decal removals, or even fully custom race replicas.
The Final Decision
Choosing new fairings is an exciting opportunity to refresh your ride. By prioritizing injection-molded ABS plastic, verifying your fitment, and choosing a supplier that values quality finishes, you can ensure your project is a success. Don't let your bike sit in the garage waiting for parts that don't fit. Make the smart choice for quality and get back on the road where you belong.
Ready to find the perfect look for your motorcycle?

Browse the Amotopart Fairing Collection to start your transformation
The Ultimate Buyer’s Guide to Racing and Flight Simulators
By Zayam AR
Published on 2025-12-11 17:33:00
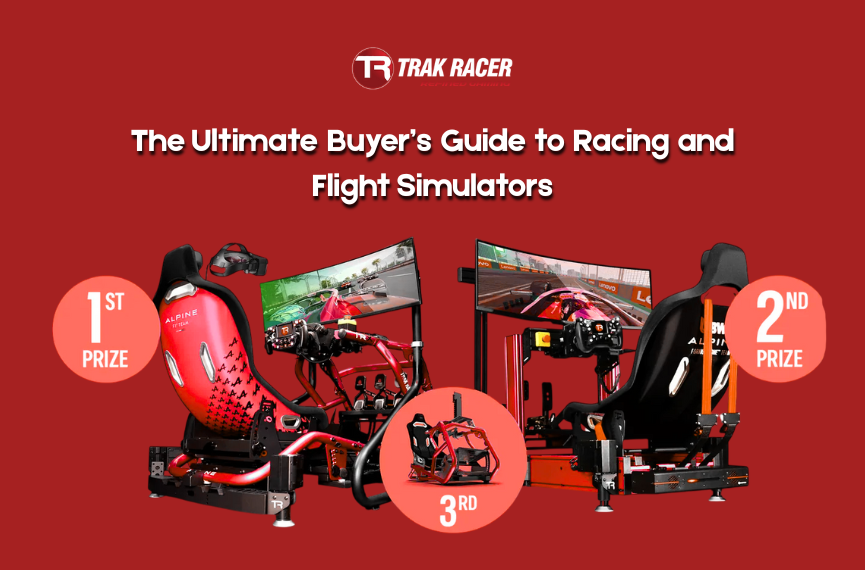
By Trak Racer's build a pro-level racing or flight simulator with the right frame, controls, seat, and accessories. Upgrade smartly and enjoy immersive, realistic performance.
If you’re reading this, chances are you want more out of your virtual racing or flight experience. Maybe you’ve watched a pro streamer or visited a sim cafe. Perhaps you’re simply ready to replace the wobbly desk-and-wheel combo that’s been holding you back. Wherever you are on your journey, this guide aims to help you make smart choices, avoid common pitfalls, and build a setup that truly delivers, whether you’re gunning for a spot on the podium or enjoying takeoffs on a Sunday morning.
Below, we’ll break down each component that goes into premium racing simulators and flight simulators and help you decide what matters most for your needs, your space, and your ambitions.
Step 1: Why the Right Frame is Non-Negotiable
The real backbone of any simulator rig isn’t the wheel or stick; it’s the frame. Countless sim racers and virtual pilots have learned this the hard way: a flimsy base or simple wheel stand will eventually let you down. Sloppy flex, sliding pedals, or a seat that won’t stay put can turn an hour of fun into frustration.
What should you look for in a simulator frame?
-
- Build Quality: Choose a frame made from durable materials, like powder-coated steel or thick aluminum. These resist flex and stand up to heavy braking or the demands of a direct-drive wheel.
- Ergonomics and Adjustability: Your hours-long sessions deserve comfort. Well-designed rigs, like those from Trak Racer, let you adjust seat position, wheel height, and pedal angle so you can dial in a natural, authentic driving or flying posture.
- Platform Flexibility: A strong perk of investing in Trak Racer is broad compatibility. Their rigs support peripherals from all the major brands, such think Fanatec, Logitech, Thrustmaster, which means the frame grows with you, no matter how your gear evolves.
- Build Quality: Choose a frame made from durable materials, like powder-coated steel or thick aluminum. These resist flex and stand up to heavy braking or the demands of a direct-drive wheel.
Comparing options: If you’re just dipping your toes in, a wheel stand can suffice, but you’ll quickly notice the difference upgrading to a dedicated cockpit makes. Once you try a full rig, you’ll see why serious enthusiasts won’t go back.
Step 2: Controls That Connect You to the Action
The magic of simulation is in feeling like you’re actually the e taking a corner at Silverstone, or lining up a crosswind landing. That immersion depends on the physical controls you use.
For Racing Setups:
-
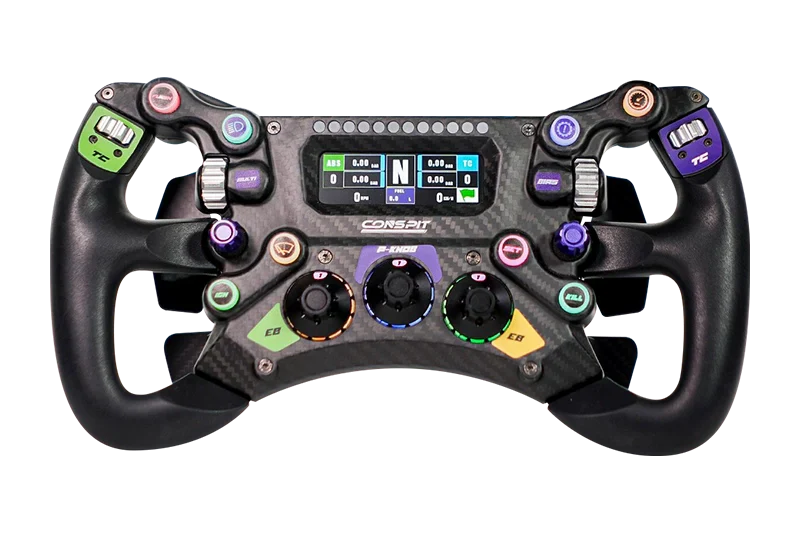
- Wheelbase: This unit provides forcfeedbacac,, helping you sense everything from curbs to tire grip. Direct-drive models offer phenomenal realism and power, but even quality belt-driven wheels can elevate your experience.
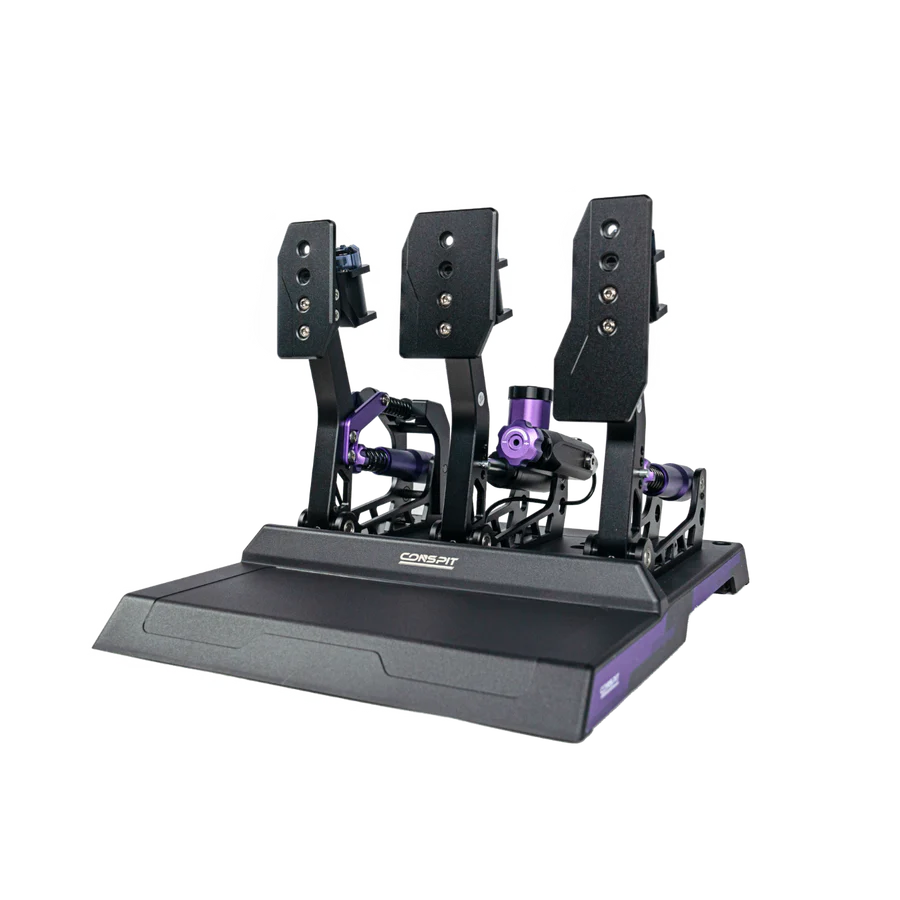
- Pedals: Seasoned sim racers quickly learn that consistent, progressive pedals matter just as much as, if not more than, the wheel. Look for pedals with load cells (they measure pressure, not just movement) for a car-like braking feel.
- Wheelbase: This unit provides forcfeedbacac,, helping you sense everything from curbs to tire grip. Direct-drive models offer phenomenal realism and power, but even quality belt-driven wheels can elevate your experience.
Buy Now
For Flight Simulators:
-
- Yoke or Joystick: Commercial pilots and GA flyers tend to prefer a yoke, while flight sim fans who fly military jets or aerobatic aircraft often opt for a joystick.
- Throttle Quadrant: Adds essential realism, letting you control engine power, flaps, and more with true-to-life precision.
- Rudder Pedals: These complete your cockpit, giving full axis control for taxiing, flight corrections, and smooth landings.
- Yoke or Joystick: Commercial pilots and GA flyers tend to prefer a yoke, while flight sim fans who fly military jets or aerobatic aircraft often opt for a joystick.
Buy Now
Pro tip: Match your “command center” to your favorite style of sim F1, GT, rally, airliner, or fighter jet. And if you love a bit of everything, modular rigs from Trak Racer let you swap and upgrade easily.
Step 3: Don’t Underestimate Your Seat
It’s not flashy, but your seat is what keeps you playing comfortably run after run. Hours can fly by when you’re comfortable, but aches make even the best sim less appealing.
-
- GT-Style Recliners: Perfect if you want the adjustability and feel of a road car, with comfort for longer stints.
- Fixed Bucket Seats: If maximum support and a true racing posture are your goal, a fixed-back bucket seat bolts you in just like a real track car, which can help you pick up subtle force feedback.
- Flight Seats: Upright, with cutouts for yokes or center sticks, these cater to pilots looking for long-haul comfort and realism.
- GT-Style Recliners: Perfect if you want the adjustability and feel of a road car, with comfort for longer stints.
Trak Racer’s seat lineup is engineered to work seamlessly with their rigs, no jury rigging or headaches about fit.
Step 4: Bring the Experience to Life with Screens and Accessories
The last mile, the difference between good and great, is all about your view and fine touches.
-
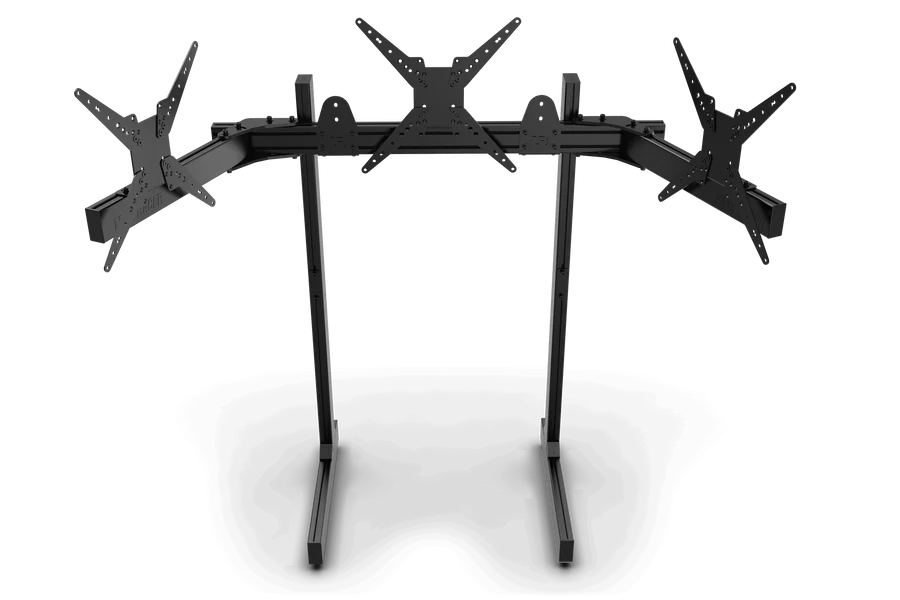
- Monitor Stands: Mounting your screen (or a triple-screen setup) directly to your rig keeps your field of view perfect and stable. No more shaky desks or awkward sightlines.
- Virtual Reality (VR): If you want the next level of immersion, a headset like the Pimax Crystal Light can put you smack in the middle of the cockpit, letting you glance at gauges or check your mirrors with instinctive movements.
- Add-ons That Make a Difference: Think keyboard trays, speaker mounts, or cup holders for those marathon race nights. These little upgrades go a long way in making your sim time enjoyable.
- Monitor Stands: Mounting your screen (or a triple-screen setup) directly to your rig keeps your field of view perfect and stable. No more shaky desks or awkward sightlines.
Buy Now
How to Build Your Dream Rig (and Stick to Budget)
Nobody says you need to buy everything on day one. Start with the rig and seat your foundation, then gradually add wheel, pedals, and accessories as your hobby (and skill) grows. With a platform like Trak Racer’s, your investment is protected and “future-proofed”.
If you’re uncertain where to begin or which products will fit your unique space or needs, Trak Racer’s team and community are a reliable resource, generously sharing build advice, upgrade ideas, and honest feedback.
Frequently Asked Questions (FAQ)
Is the frame really that important, or should I focus on the wheel?
Even the best wheel can’t overcome a flexible or unstable base. If you care about consistency and realism, upgrade your frame first.
Can I get away with a single monitor, or should I invest in triples or VR?
A single monitor works for most, but adding triple screens or trying VR dramatically improves immersion and situational awareness for both racers and pilots.
What’s the ideal footprint for a home simulator?
Set aside at least 2' x 5' for a typical rig, plus room to get in and out comfortably. Always compare specific product measurements.
Can one rig be used for both racing and flight simulation?
Many frames, including Trak Racer’s, are designed to be modular. You can add flight controls to a racing rig or vice versa.
Are load cell pedals really worth the extra investment for beginners?
If you take simulation seriously or want to build good habits from day one, yes. Load cell pedals offer a consistent, authentic brake feel, making you a better driver.
Ready to take the plunge? Explore Trak Racer’s range of frames, seats, and accessories to create a simulator that’s built for you, whether you’re flying sky high or chasing the racing line. For pro tips, honest reviews, or installation support, check the community page, product FAQs, or reach out to contact support. Quality simulation starts with a quality foundation, and Trak Racer is ready to help you drive, fly, and race at your very best.
BLOGS


Related
Why James Oro Frames Are the Ultimate Statement in Luxury Eyewear

The Science of Rest: How the Plufl Redefines Comfort and Sleep

5 Reasons Peter Stone Jewelry is the Perfect Gift for Any Occasion

The Ultimate Guide to Choosing and Caring for Wooden Maps